
Dental chair installation handover is the point at which a purchased configuration becomes an operatory that the clinic can inspect, document and support. For a clinic owner or project manager, the job is not to replace the installer. It is to make sure the right people have the right drawings, the delivered items match the order, tests are recorded, and unresolved defects have a named owner.
This guide focuses on coordination and acceptance. The separate dental chair installation guide covers the broader sequence from site preparation through setup. Always follow the current manufacturer manual and use appropriately qualified personnel for electrical, plumbing and equipment work.

Define responsibility before the equipment arrives
Many installation problems are coordination problems rather than product problems. The chair supplier may provide model drawings and setup instructions, while local contractors prepare power, air, water, drainage, suction and floor fixings. The installer connects and tests the unit, and the clinic confirms that the result matches the approved room plan. Put these roles in writing before delivery.
| Workstream | Typical responsible party | Evidence to retain |
|---|---|---|
| Model and configuration confirmation | Buyer and supplier | Signed quotation, option list, revision and product drawing |
| Room and utility preparation | Clinic project lead and local contractors | Site survey, marked-up plan and contractor completion record |
| Unpacking and installation | Authorized or qualified installer | Packing check, installation record and photographs |
| Functional acceptance | Installer with clinic representative | Test sheet, exceptions list and corrective-action owner |
| Training and document handover | Supplier, distributor or installer | Attendance record, manuals, parts list and support contacts |
Pre-arrival document pack
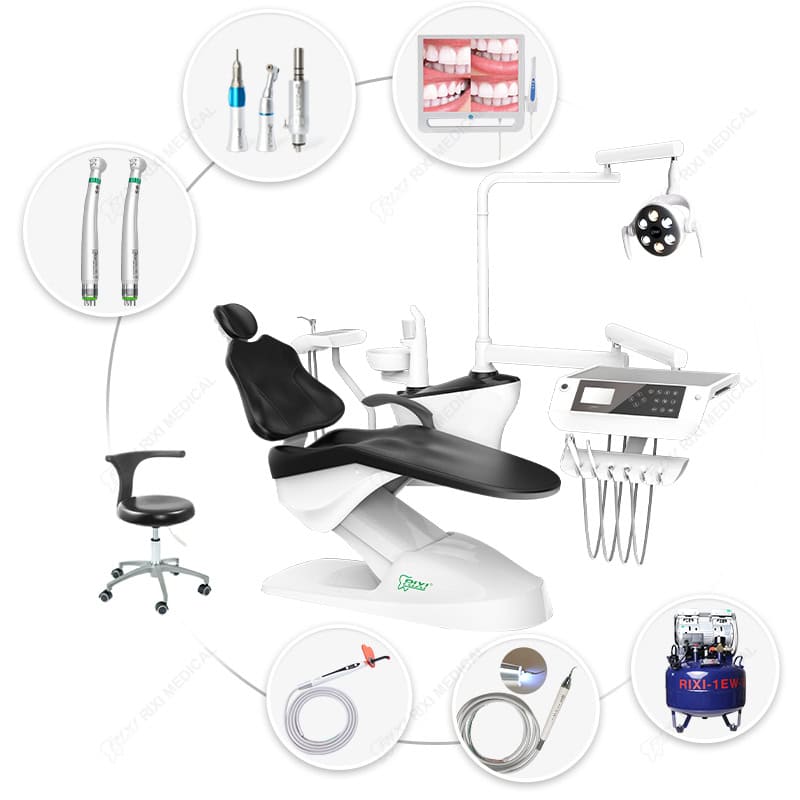
Ask the supplier for a model-specific pack rather than relying on a generic brochure. At minimum, it should identify the quoted chair, delivery system, operating light, assistant module, cuspidor, upholstery and optional devices. The dimensioned plan should show the chair base, mounting points, movement envelope, delivery-arm travel and service access.
Utility requirements must be reconciled with the final room drawing. The dental chair power and utility guide explains the information contractors need, while the dental chair plumbing requirements guide addresses water, drainage and suction coordination. Record any site deviation and obtain written confirmation before equipment is connected.
Receiving inspection before assembly
- Match package labels and model references to the purchase order and packing list.
- Count cartons and identify visible transport damage before moving items from the receiving area.
- Photograph damaged packaging, serial or model labels and the condition of major components.
- Separate installation hardware, accessories and optional modules so they are not discarded with packaging.
- Quarantine any item whose identity or condition is uncertain; do not improvise a substitute without approval.
- Keep the carrier record and supplier notification together with the receiving checklist.
Receiving acceptance is not the same as functional acceptance. A chair may arrive without visible damage but still require connection, adjustment and testing before the clinic signs off the installation.
Site readiness walk-through
Before placing the chair, compare the built room with the approved plan. Check the location of connection points, floor finish, mounting area, cabinet clearance, door swing, cleaning access and routes for delivery equipment. Confirm that the light and delivery arms can move without contacting walls, monitors or ceiling-mounted services.
Air quality and available flow affect more than the chair. If the project includes a central compressor, use the dental air compressor sizing guide to coordinate simultaneous demand and treatment-room requirements. Do not assume a compressor shown in a package photo is sized for the whole clinic.
Functional acceptance checklist
- Identity and configuration: confirm model, revision, upholstery, delivery arrangement and all ordered options.
- Chair movement: operate each control through the intended range; observe for obstruction, unexpected noise or inconsistent stopping.
- Delivery assembly: load the intended instruments, check holders and hoses, and verify that the arm parks and holds position.
- Assistant and cuspidor functions: inspect installed components and test only according to the model instructions.
- Light and controls: verify movement, control response and any approved modes without assuming features that are not on the order.
- Utilities: inspect visible joints and confirm that air, water, drainage and suction behave as specified during the test.
- Cleaning and service access: confirm that covers, filters, valves and routine service points can be reached in the finished room.
- Safety and room clearance: check patient entry, staff circulation, emergency access and conflict with cabinetry or other equipment.
Where a chair uses a hydraulic or electromechanical movement system, the installation and service-access checklist provides a focused review of access panels, movement testing and handover evidence.

Manage exceptions instead of signing a vague completion note
Create a punch list for every incomplete, damaged or nonconforming item. Each entry should state the observation, photo reference, responsible party, agreed action and target follow-up date. Separate issues that prevent safe use from cosmetic or documentation items. The clinic should not mark an unresolved item as complete merely because the installer is leaving the site.
If the correct response is uncertain, stop and consult the current manual or supplier. Avoid unauthorized adjustments that could make later diagnosis harder. RIXI’s technical support page is the appropriate route for model-specific documentation and service coordination.
Training and final handover package
The practical handover should show the team how to start and stop the equipment, use the installed controls, place the chair in normal working positions, park the delivery assembly, access user-maintenance points and report a fault. Training should not be used to introduce features that were not installed or approved.
Retain the final layout, connection drawing, manuals, packing list, model or serial records, option list, acceptance sheet, punch list, training record, photographs and support contacts in one equipment file. Give maintenance personnel access to the same revision-controlled information.
Frequently asked questions
Who should sign the installation handover?
A clinic representative with authority to record exceptions should sign together with the installer or supplier representative. Local practice may require additional contractor records.
Can the clinic accept the chair with open items?
That depends on the nature of the item. Record every exception and do not place equipment into use when a defect, missing document or incomplete test prevents safe, intended operation.
Should utilities be tested before chair delivery?
Yes, contractors should complete and document their work before equipment connection where practical. The installer should still verify the relevant conditions against the model requirements.
What if the installed configuration differs from the quotation?
Photograph the difference, identify the affected item and request written resolution. Do not rely on a verbal promise or an unrecorded substitution.
Scope note and next step
This checklist supports project control and acceptance; it is not an installation manual and does not authorize technical work. For a configuration-specific handover pack, send the room plan, model list and known utility information through the RIXI Medical contact page.
Need Dental Equipment Pricing or Configuration Details?
Contact RIXI Medical for model comparison, distributor pricing, packaging information, OEM/ODM requirements and after-sales support.
Request Product Information